Step By Step Guide
How To Install Metamask Wallet
If you want to store Ethereum and other ERC-20 Tokens in a safe and easily accessible place, many people say that MetaMask is the way to go.
Not only is this extension safe, but it is also free. It works by enabling web apps to not only read but also interact with the Ethereum blockchain.
Step By Step
Setting Up a
MetaMask Wallet
Step 1
To create a new wallet, you must first install the extension. There are various platforms to find it based on your browser. MetaMask is available in most browsers’ shops, so getting it isn’t difficult – these include Chrome, Firefox, and Opera.
This example shows how you would install the extension on the Firefox browser; however, the steps will remain the same no matter which browser you choose.
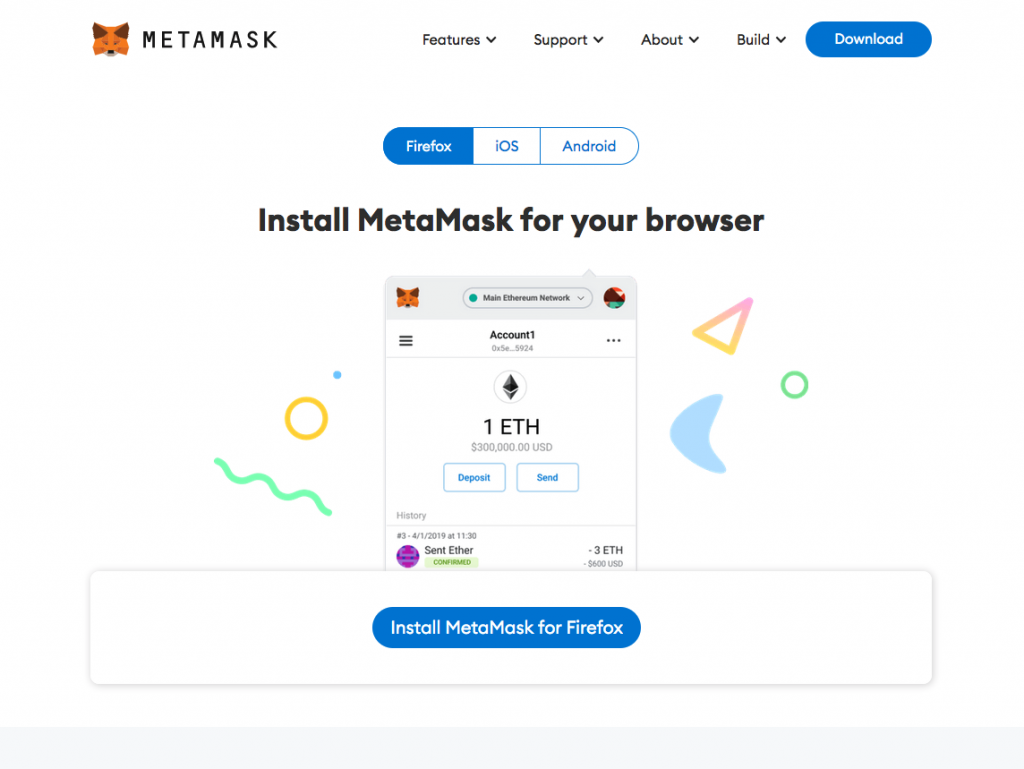
To begin the installation, you should press ‘Install MetaMask for Firefox.’
Step 2
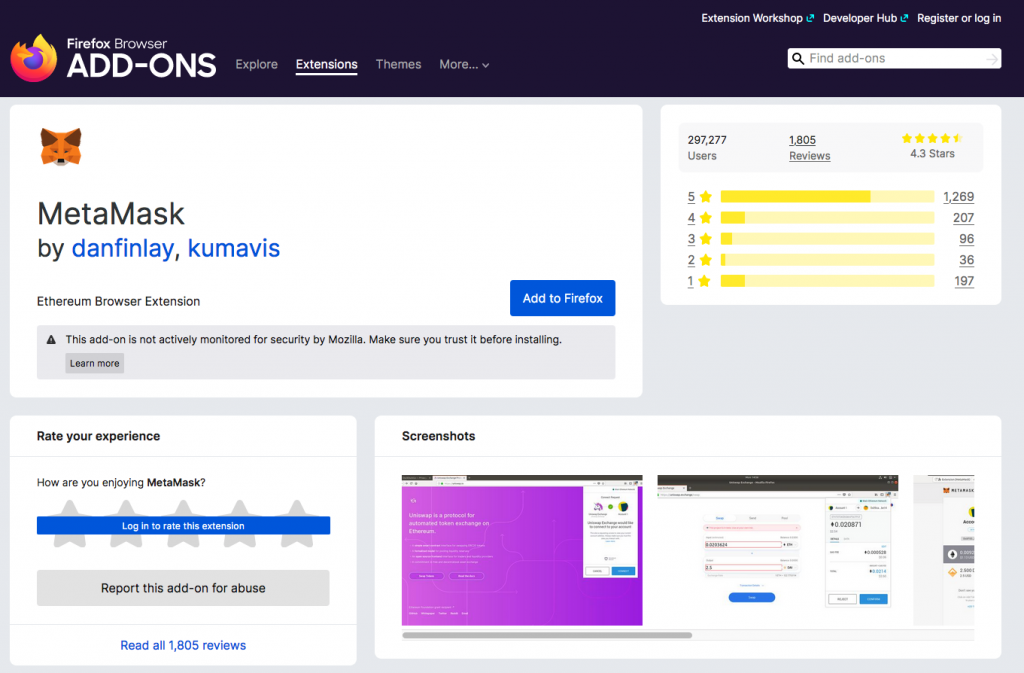
Here, you should press ‘Add to Firefox’ or whatever browser you are using to begin the installation of the extension.
Step 3
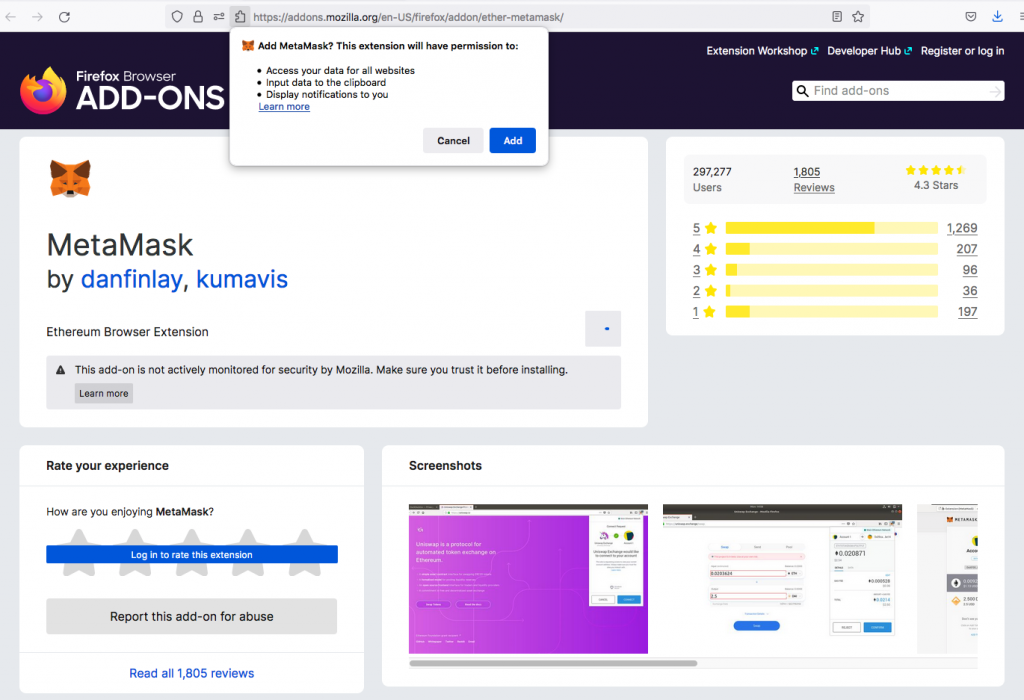
Now, you should click ‘Add’ to finish the installation process of the extension and grant it the permission it requires to begin functioning as desired.
Step 4
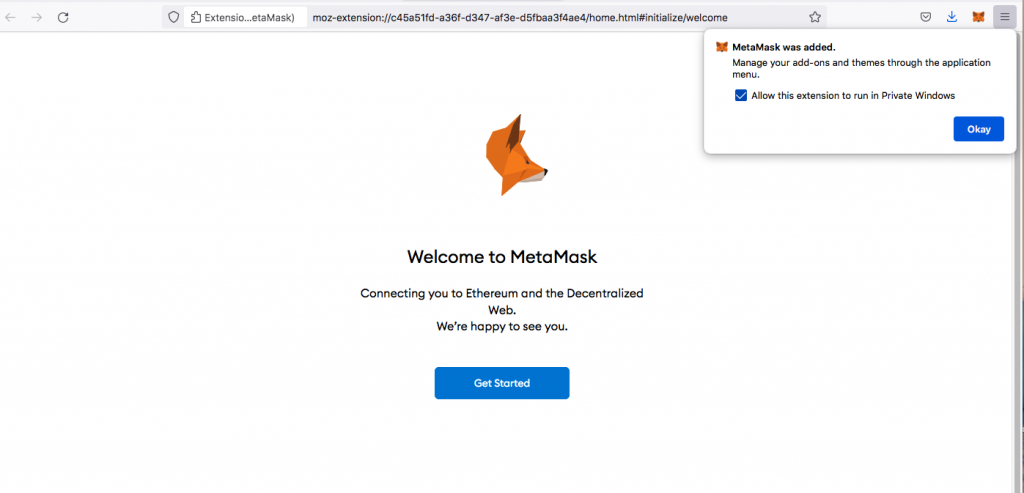
Now, check the box and press ‘Okay’ to let the extension run, as well as to move onto the other steps.
Also, click ‘Get Started’ to begin setting up your wallet.
Step 5
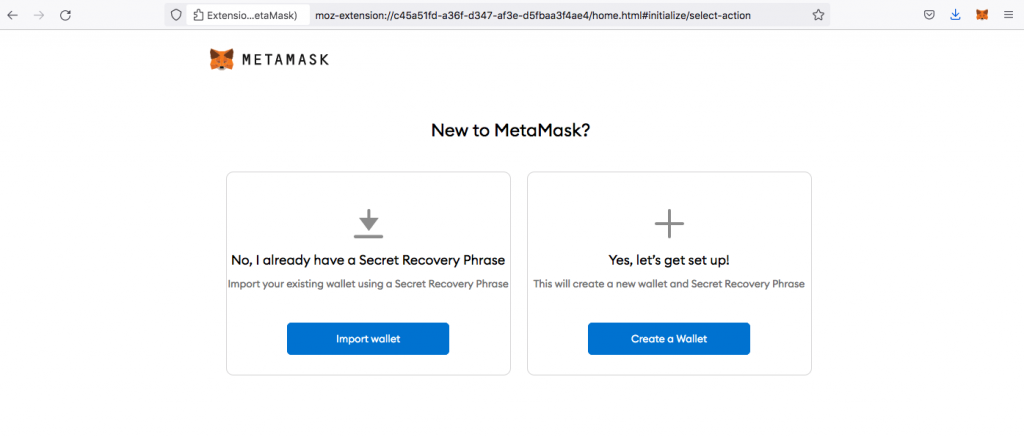
To create a new Ethereum wallet, click the ‘Create a Wallet’ button. Select ‘Import Wallet’ to restore your wallet and access your existing funds if you have already made one.
Step 6
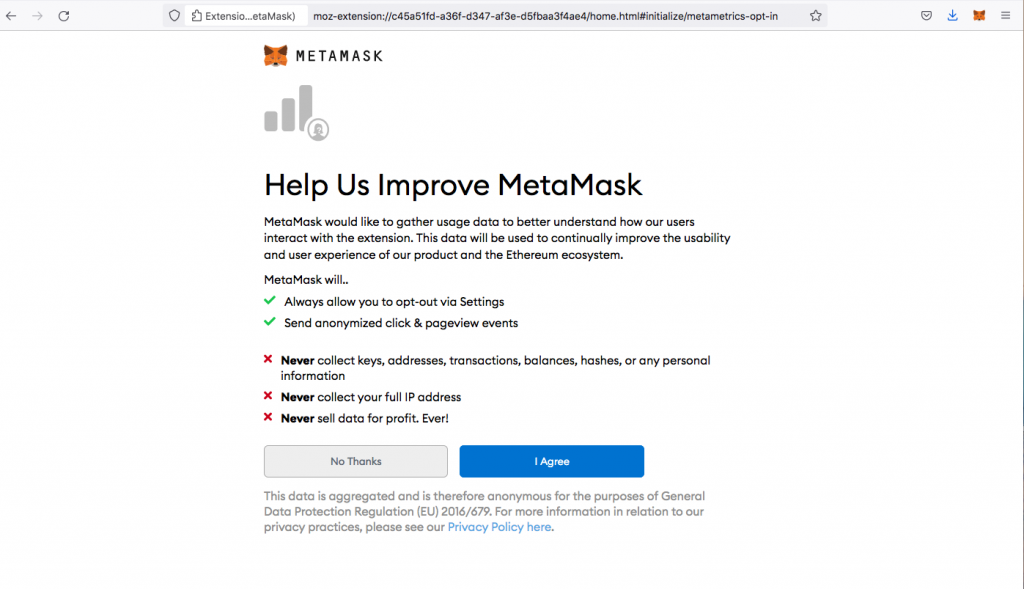
Here, it is entirely up to you if you want to agree or disagree with letting MetaMask collect your data. Choose one of the given options to proceed to the next step.
Step 7
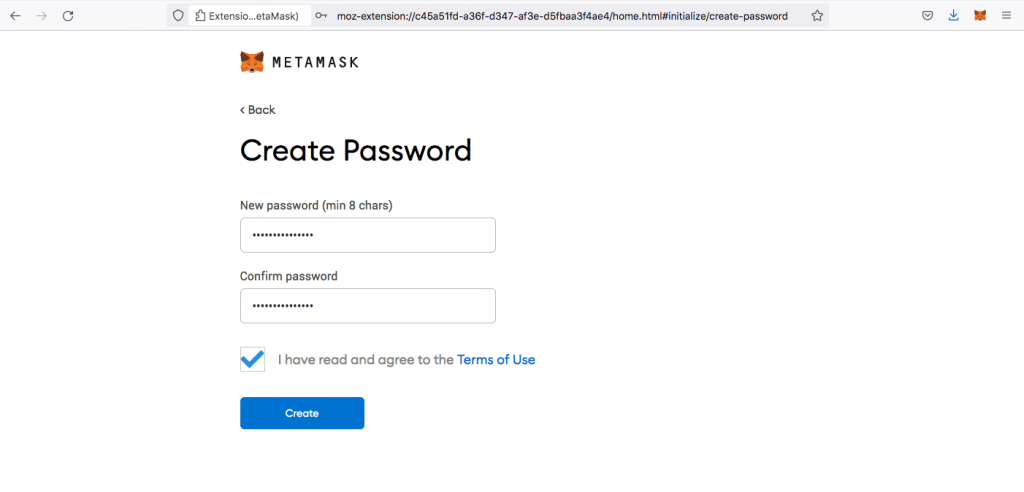
For your wallet, create a password. Despite the fact that you should keep this password safe, you can still access your wallet if you forget it.
Remember to check the box to agree to the Terms of Use.
Step 8
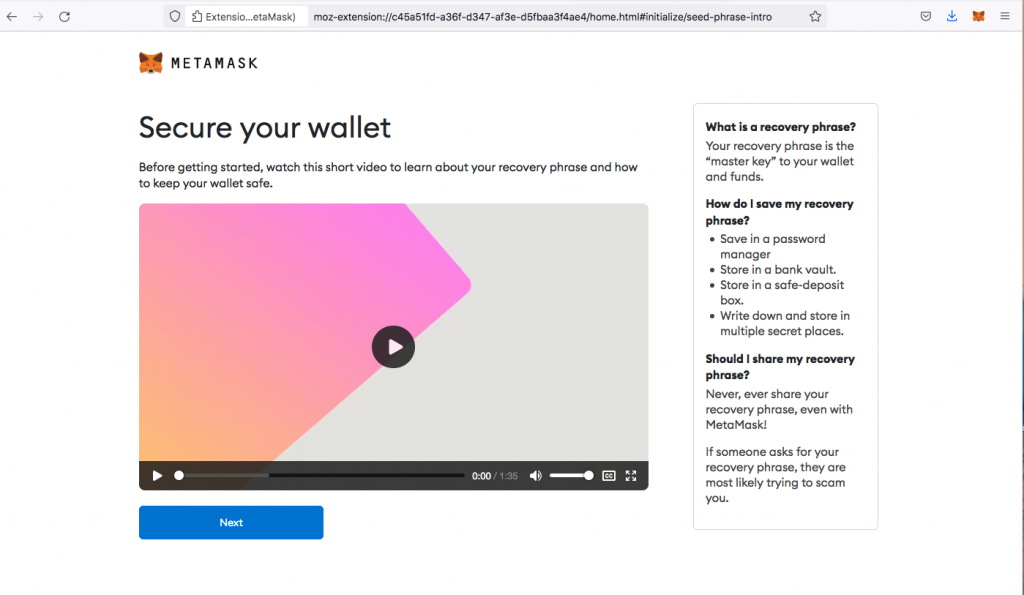
Before continuing to the next steps, it would be beneficial to watch the video provided to understand better how to secure your wallet.
Step 9
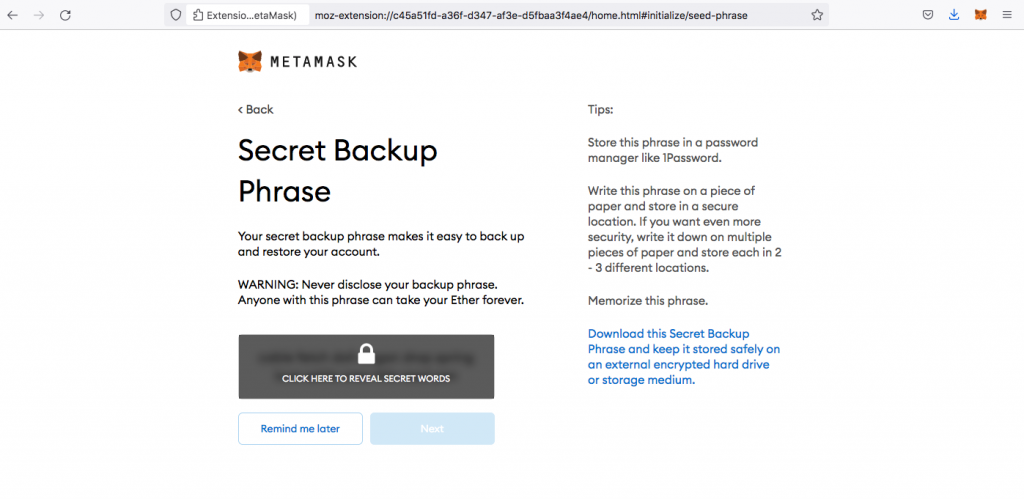
To get your secret phrase, you need to click on the lock.
Your Ethereum wallet will be accessible for anybody that knows your secret phrase, and you will be unable to restore it without it.
Step 10
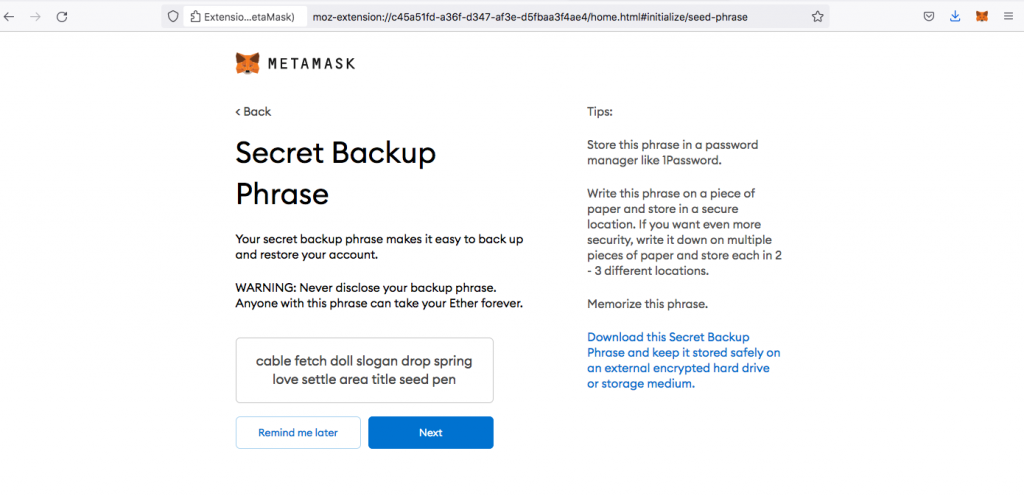
This is your secret phrase. It would be best if you kept this secured and did not lose it.
PLEASE NOTE: You would never show your secret backup phrase to anyone. I am showing this here for demonstration purposes only. I will never be using this wallet again. This is only to show the process step by step of how to install a MetaMask wallet.
Step 11
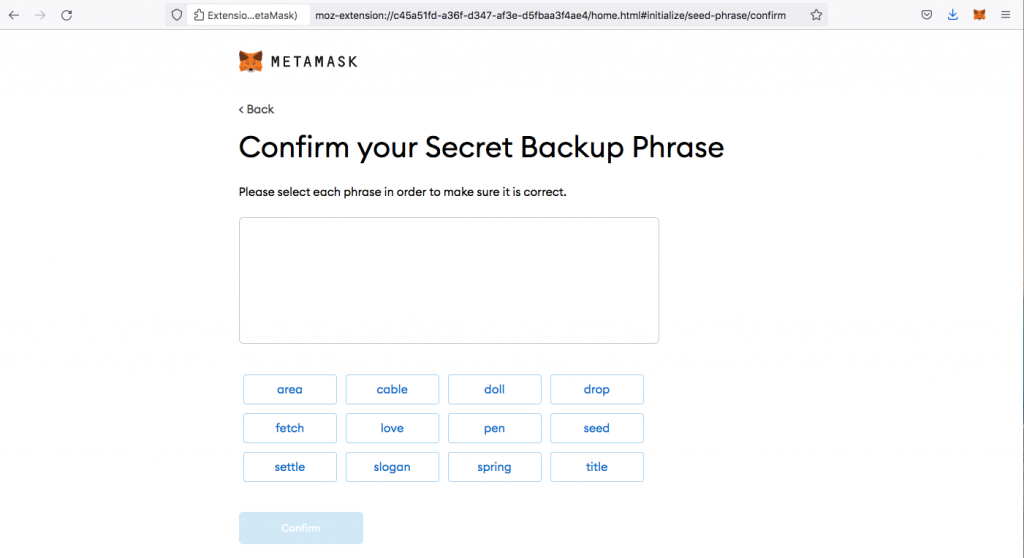
To confirm that you have written down your seed phrase accurately, click on the words in the correct order.
Step 12
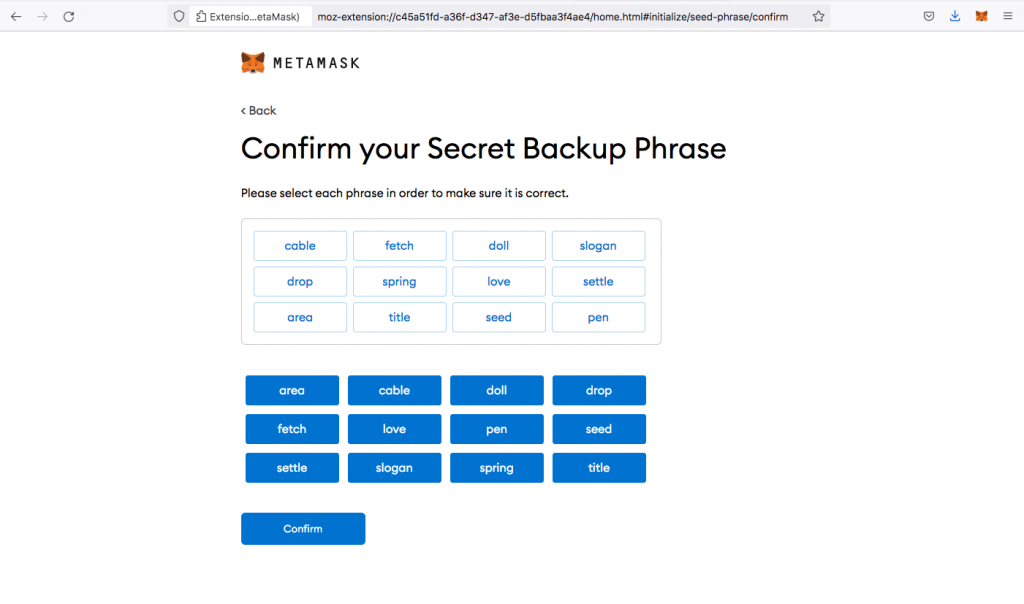
Now that you have written down your secret phrase in the correct order press the ‘Confirm’ button.
PLEASE NOTE: You would never show your secret backup phrase to anyone. I am showing this here for demonstration purposes only. I will never be using this wallet again. This is only to show the process step by step of how to install a MetaMask wallet.
Step 13
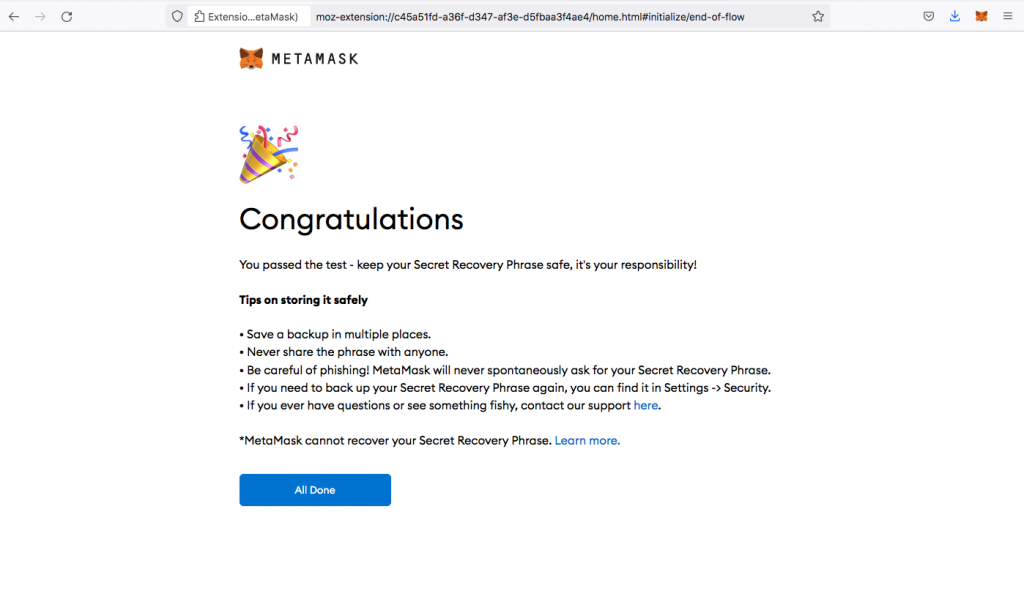
Your MetaMask Wallet has been successfully set up! Press the ‘All Done’ button to proceed.
Step 14
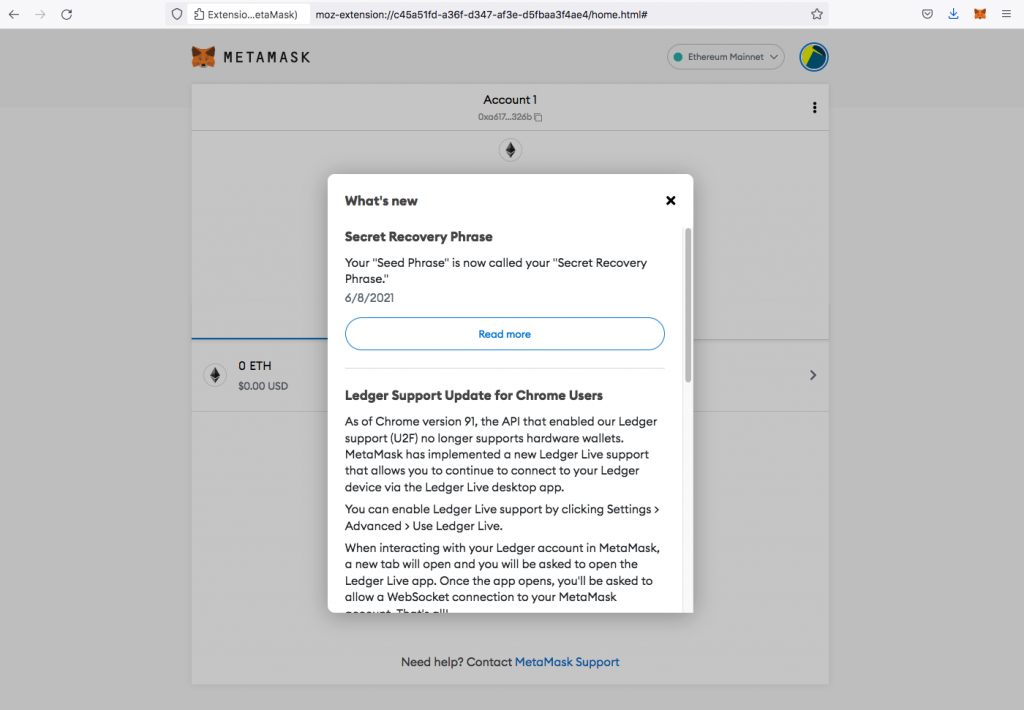
This is how your wallet looks when you open it for the first time. You can go to ‘Read more’ for more information on the different changes in newer updates.
Step 15
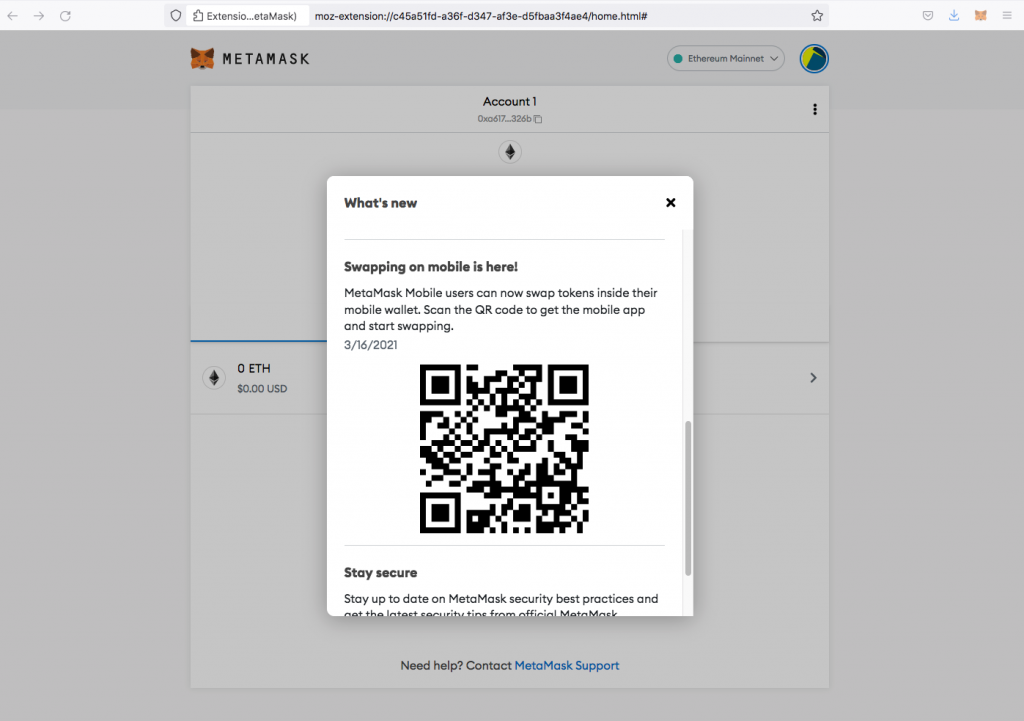
If you’d like to have MetaMask on your phone for accessibility as well as convenience, then you can scan the given QR code to download the app and enjoy swapping directly from your phone.
Step 16
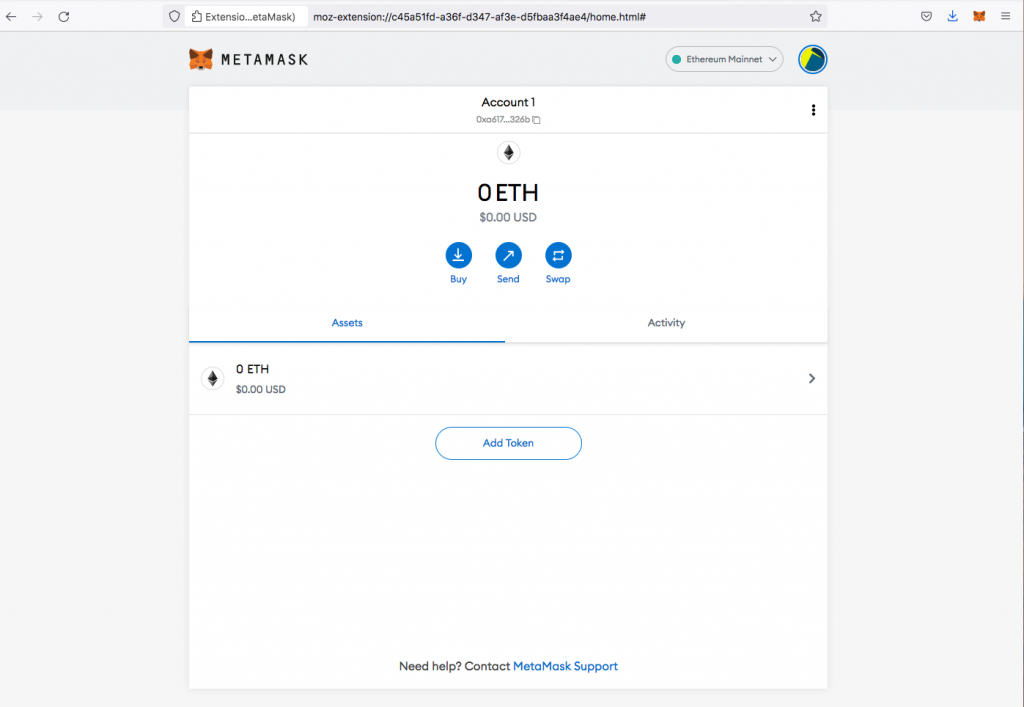
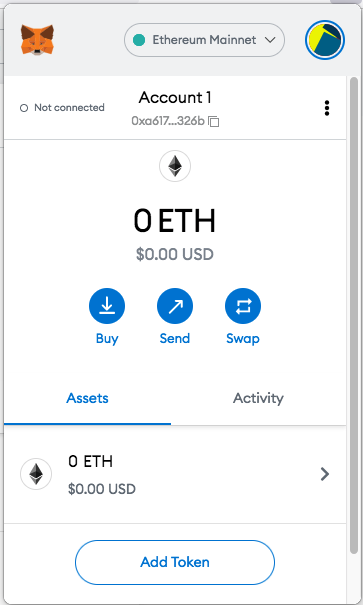
When you look at your wallet account, this is the information that shows up.
Your wallet address is visible, which can be copied and shared. You have the options of buying, selling, and swapping.
Additionally, your assets will all be visible, where you can add your tokens, so they are all in one place.
Step 17
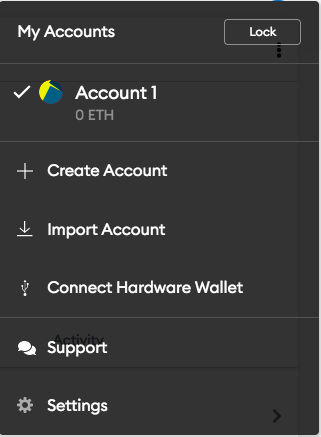
Here, you can go through the different options available, as well as check out the settings.
To lock your account (essentially another word for logout), press ‘Lock.’
Step 18
To open your account, click on the circled image in the top right corner of the UI (user interface).
Step 19
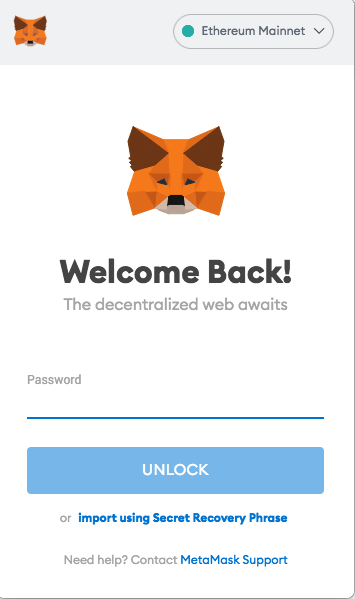
You have successfully logged out and will now require your password to log back in and access your account.
Completed
Congratulations you have now set up your Metamask wallet.


