Step By Step Guide
How to Install a Binance Wallet
The official Binance cryptocurrency wallet for accessing Binance Smart Chain, Binance Chain, and Ethereum is none other than Binance Chain Wallet. You may use it to hold your cryptocurrency safely and connect to thousands of projects on several blockchains.
If you want to exchange BNB for other tokens, mint NFTs, or do yield farming, the browser extension wallet makes it simple. Chrome, Firefox, and Brave are currently supported by the Binance Chain Wallet.
With Wallet Direct, you can effortlessly link your Binance account to your wallet, provided you already have one. While transferring digital assets between the two, this feature allows you to avoid copying and pasting addresses.
Setting Up Your Binance Chain Wallet
On the Binance Chain portal, you can download the Binance Chain Wallet. Just choose the browser to which you wish to add the extension.
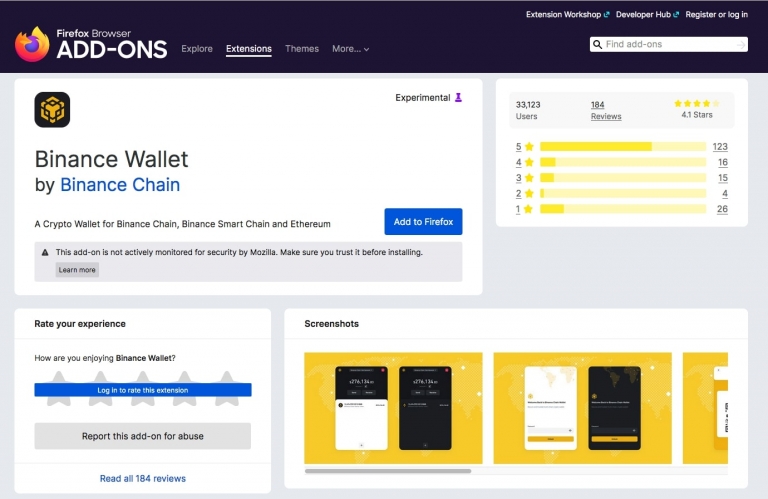
In the example given below, we’ll showcase how one would go about adding the extension to your Firefox browser or whichever browser you are using.
Here, you’d click ‘Add to Firefox.’
Step 1
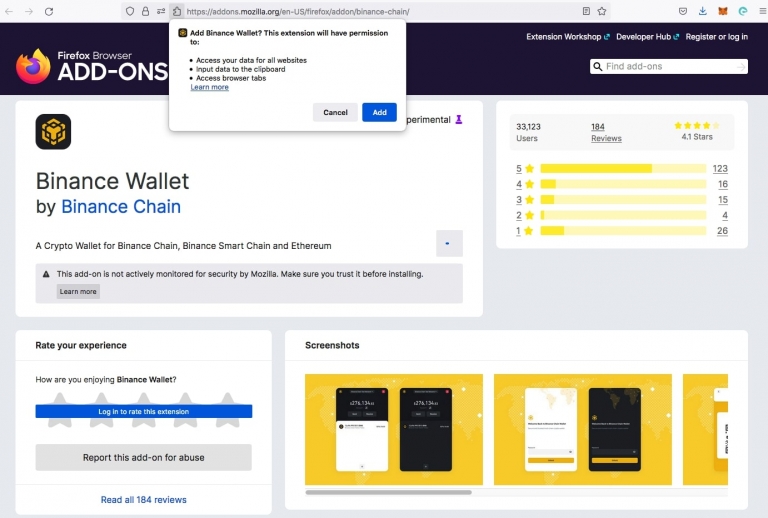
In this step, you would click ‘Add’ to add the Binance Wallet extension to your browser and grant it access.
Step 2
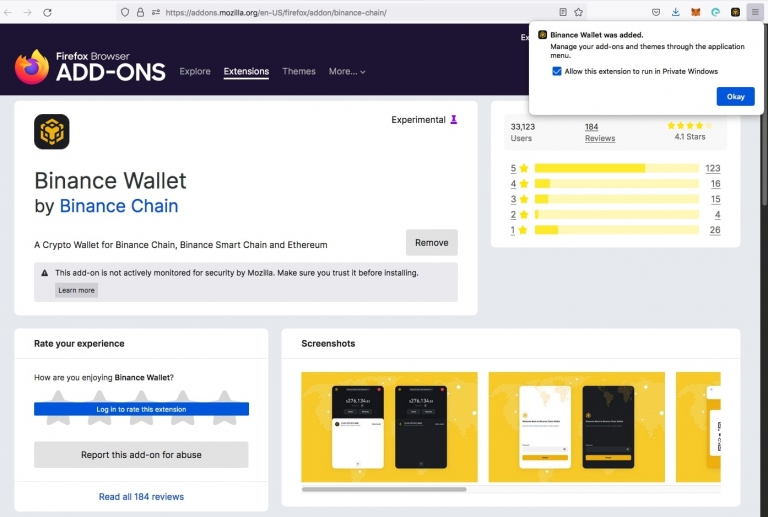
Here, it shows that your Binance Wallet extension has been successfully added. Just tick the box to grant the extension access to run in Private Windows, and simply click ‘Okay’ to continue.
Step 3
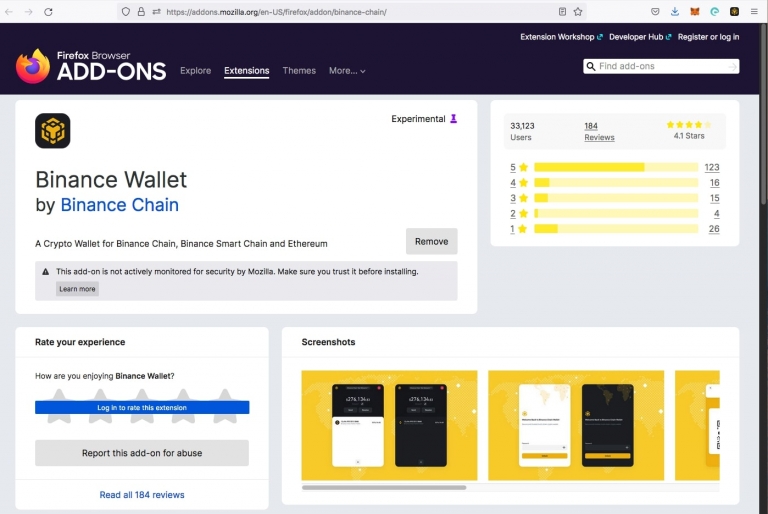
Your extension is all ready! Now, we’ll explain how to create your wallet.
Step 4
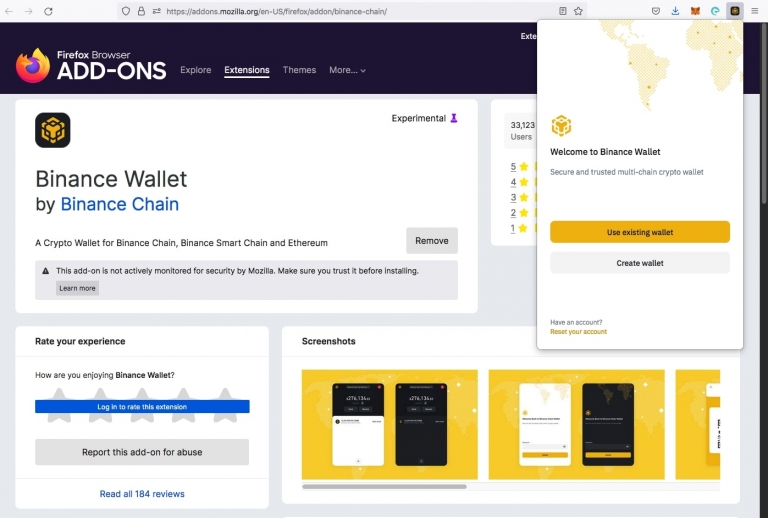
Click on the extension on the top right of your screen. Here, you have to choose between using an existing wallet, if you have one already, or creating a new one.
Step 5
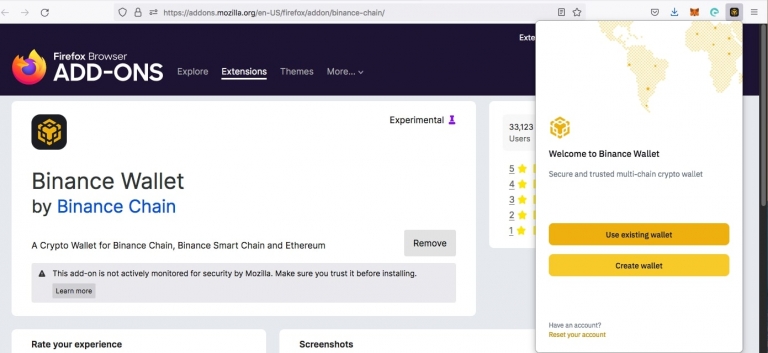
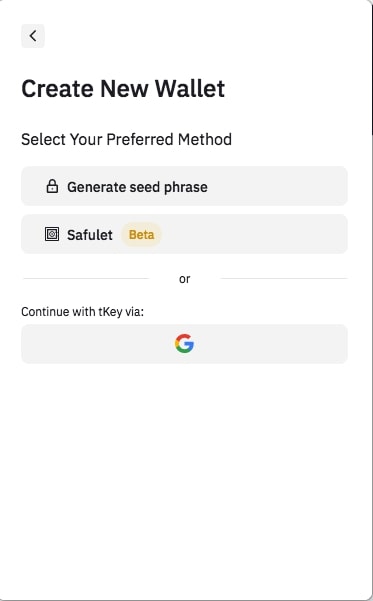
Since we’re trying to showcase how to create a wallet, go ahead and select the second option of ‘Create wallet.’
Step 6
We’re going to make a new wallet with a Gmail account in this example.
It is to be noted that if you already have your original seed phrase or tKey login credentials, you could also use an existing crypto wallet.
Here, you should click the option of ‘Continue with tKey via G.’
Step 7
Here, you’ll get a pop-up prompting you to log in using Gmail. If necessary, tKey and Binance Chain Wallet will use your Gmail account to verify your identity in the future.
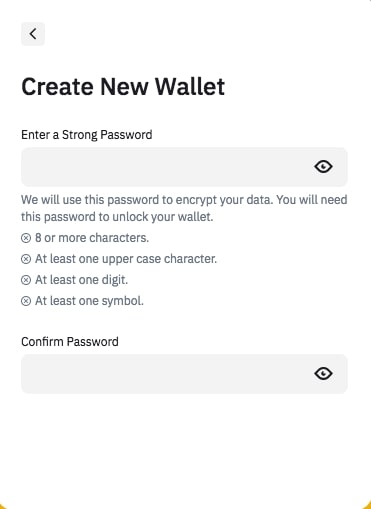
This step is to generate a password that will serve as a backup in case you lose your private key.
Step 8
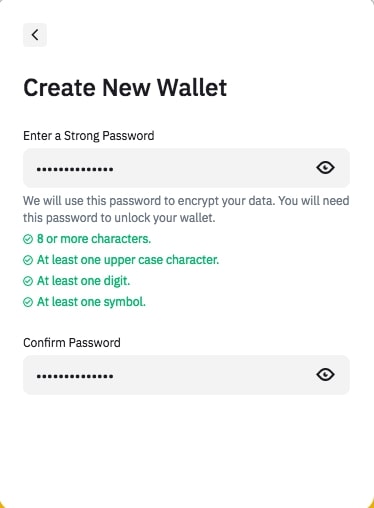
Following the given guidelines, please enter your password in both the given spaces and make sure that they both match.
Step 9
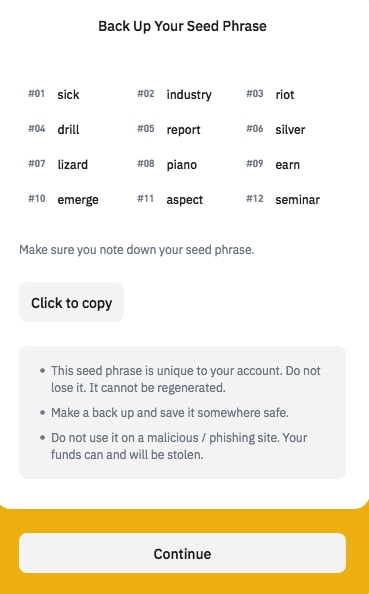
Your Binance Chain Wallet seed phrase will now appear, which you can use to retrieve your account. You can also use your imagination to come up with your own seed phrase. The phrase should have a total of 12, 15, 18, 21, or 24 words.
One shouldn’t ever tell someone your seed phrase. Consider it as if it were a pin or password for a bank account. Should you forget your tKey password, you can still access your Binance Chain Wallet using your email address and your tKey password.
Once you’re sure you’ve saved the seed phrase safely, click ‘Continue’ to proceed.
PLEASE NOTE: You would never show your secret backup phrase to anyone. I am showing this here for demonstration purposes only. I will never be using this wallet again. This is only to show the process step by step of how to install a Binance wallet.
Step 10
Your Binance Chain Wallet has been successfully set up! BSC, Binance Chain, and Ethereum tokens can now be sent and received. On these blockchains, you may also engage with DApps and smart contracts.
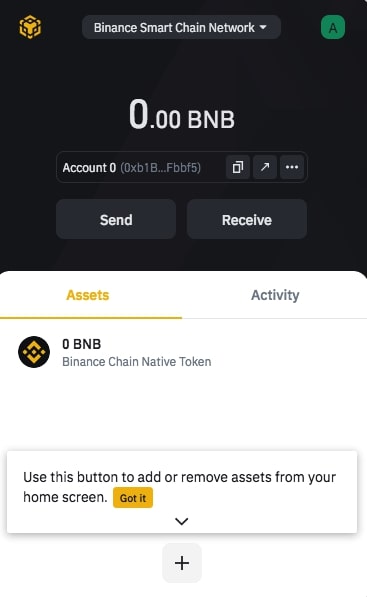
Completed
Congratulations you are finished.
